Getting Started
Installation
You’ll need to install Unity, which is free, to use the plugin. Basic knowledge of Unity is expected.
Unity
The ARitize Unity Plugin currently required Unity version 2020.1.17f1. You can get the required version from Unity’s website. Make sure to grab the iOS and Android modules during installation.
Plugin
For new users or fresh installations, download the project zip from the Download Section. Unzip the project, then in Unity open the ARitizer directory you just unzipped. Once opened, you should see a NexTech menu option at the top menu bar. Select NexTech > Open ARitizer to open the plugin menu. It is recommended that you drag the tab somewhere into your Unity Editor to dock it into a more permanent position.
If updating, first check the Changelog to make sure there aren’t any special steps needed. In most cases, you can download the UnityPackage file from the Download Section – once downloaded, in Unity go to Assets > Import Package > Custom Package and select the plugin file you downloaded – once imported, your plugin should be updated.
Next, we need to change some of the project’s settings in order for ARitize to work properly in Unity. Navigate to File > Build Settings and click the Player Settings button at the bottom left of the build setting panel. Upon selecting the button, you should see the player settings appear in your Inspector tab. In the Inspector tab, change the Color Space to Linear, the API Compatability Level to .NET 4.x, and check the Allow Unsafe Code checbox.
Creating Experiences
Clicking New Experience will create a blank experience in the _Experiences folder.
Update the AnchorForAR prefab with your assets (be sure NOT to change the name of this prefab or the Data asset).
The box in the Exporter scene can be used as a guide to help with scale – it is about 5‘10 tall. World position 0,0,0 matches where, on the real world surface, the user places the experience.
AR Modes
Currently ARitize supports three different AR Modes – each provides a different way for the app to track the world and place virtual objects within it.
- SLAM
- SLAM is short for Simultaneous Localization and Mapping and it essentially detects surfaces in the real world as you move the camera around. In this mode, the user scans for surfaces and then manually places the experience.
- Image Tracking
- This lets you specify a 2D image, such as a poster or business card, to use as a tracker that will anchor your experience automatically. While any image can be used, some images will be more suitable for tracking. For a general overview of what makes a good image target, you can read this article.
- Object Tracking
- This is similar to Image Tracking, but instead of a 2D image, you specify a physical 3D object to act as the anchor. Your experience will automatically anchor to the tracked object. Again, some objects will be more suitable for tracking than others.
More information can be found on the AR Modes page.
Adding Modules
Modules can add more functionality to your experiences.
After selecting an experience, click Edit. From here, you can add modules with the green “+” button.
More information can be found on the Modules page.
Crafting Placement Previews
Before a user places the experience, they see a visual preview of the mesh with a holographic shader. This is generated automatically, but you have some control over what is shown in this preview.
In the Data object is an array called Preview Blacklist – as the name suggests, you can add any items here that you wish to exclude and NOT render in the preview. These string fields use Target Syntax. This is useful if you want to hide the contents inside a portal or to disable things like shadow planes that do not look good rendered as a preview plane.
It’s also possible to have a mesh renderer show up in the preview but not the experience – this may be useful if you want to provide additional visual cues to help the user place the experience. To do this, simply have a mesh renderer in your experience that is turned off. These will be picked up by the preview generator but will not be visible, because they’re turned off, in the actual experience.
By utilizing these features, you can make the placement of your experience more intuitive to users.
Building NTARs
From the Build menu, simply click Build iOS or Build Android depending on what platform you want to build the NTAR for. It’s fine to only build one platform during testing, but when you intend to create something for public consumption you should be sure to build and test for both platforms.
When building an NTAR, ARitizer will automatically detect dependencies for the AnchorForAR and Data objects so that only the needed files will be included, minimizing file size.
Previewing NTARs over LAN
While developing your AR experiences, you’ll want to test them in the app before uploading them to the backend to be published. To do this, you can send NTARs directly to the ARitize app over LAN.
After selecting an experience in the plugin, click Preview under Other Actions. The plugin will try to find your LAN ip so you know what to type into the app (if this is not your computer’s LAN ip, you’ll have to find it yourself).
Then, in the ARitize app, tap the hamburger menu at the top left to go into the Settings menu, then tap Developers to go into the Developer menu. Here, enter your computer’s LAN IP and tap Connect.
The UI of the plugin and the app should update to reflect the connection status. Once connected, if you have built an NTAR file for that platform, you’ll have a Send NTAR button you can click. Doing so will send the file to the app and the app will automatically load it.
Testing NTARs within ARitize
Anchor Points
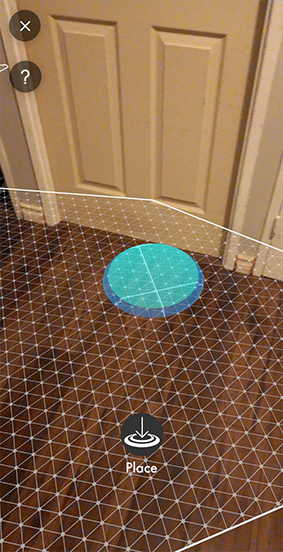
Anchor points are used to root your experience within your camera’s view. Allow your device’s camera to scan for planes within your environment (ground or wall) and, once the grid preview appears, select the Place button to anchor your experience. When placing an experience, all Gameobjects that are set to be rendered within Unity will appear in the Placement Preview.
Initial Scale
Generally, experiences should be set to real world scale (approximately life sized), however, sometimes it is better to setup your experience so that the objects fit within the confines of the target device’s screen. If use case is variable, it is important that you include a Transform Manipulator Module so that users can resize the experience themselves.
Troubleshooting Holograms
While working with Holograms, you may encounter visual abnormalities – anything from artefacting to colored outlines, etc.
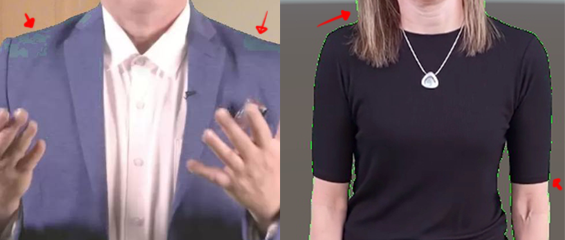
In most cases you will be able to fix these issues by adjusting the chosen shader’s properties, either Hologrammask or VideoModuleHologram, within your hologram material. Specifically, ensure that the Mask Color matches the color of the video’s background and adjust the Threshold slider to reduce the background spill around the subject. If an outline remains, you can try setting Tint1 or Tint2 to reduce its visibility.
If problems persist, it is sometimes necessary to import the video file into an editing software and use the color correction tools to balance/remove problematic colors. For example, removing green highlights/reflections in a video which uses a green screen.
Uploading NTARs to the Management Console
Download the Image Assets Templates for channel and experience assets – you’ll customize these in your preferred image editing software.
Using the login credentials provided, login to your account in the management console. To change your password, click on your profile in the top right and go to Manage Account.
The first thing you’ll see is an empty channel list – to create your first channel, click the plus sign:

Enter the details for your channel:
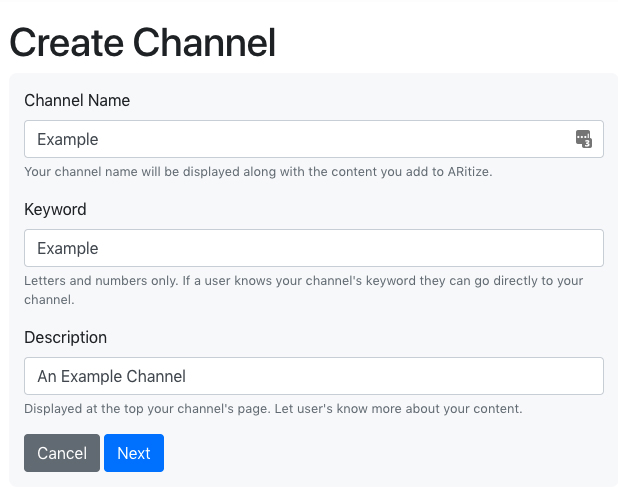
- Channel Name
- The display name of your channel displayed on your channel’s page and on your experiences.
- Keyword
- Used like a URL to your channel – users can enter this code to go directly to your channel. Will also be used as a prefix for experience codes.
- Description
- Short description that will be displayed on your channel’s page
Click Next, then upload image assets for your channel:
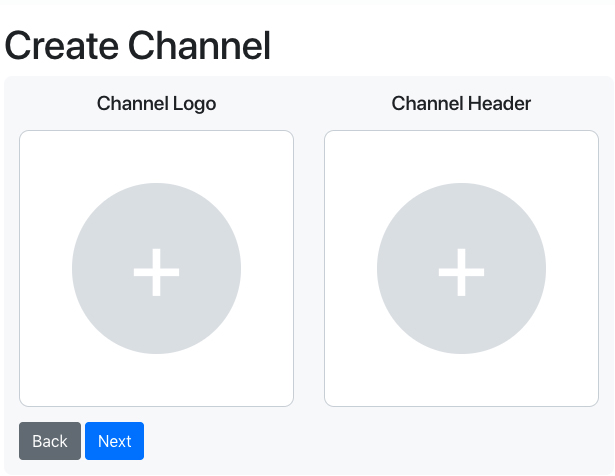
- Channel Logo
- Displayed in channel lists
- Channel Header
- Displayed at the top of your channel’s page
Then confirm your details and click Done. Now that your channel is created, you can enter it and start adding experiences:
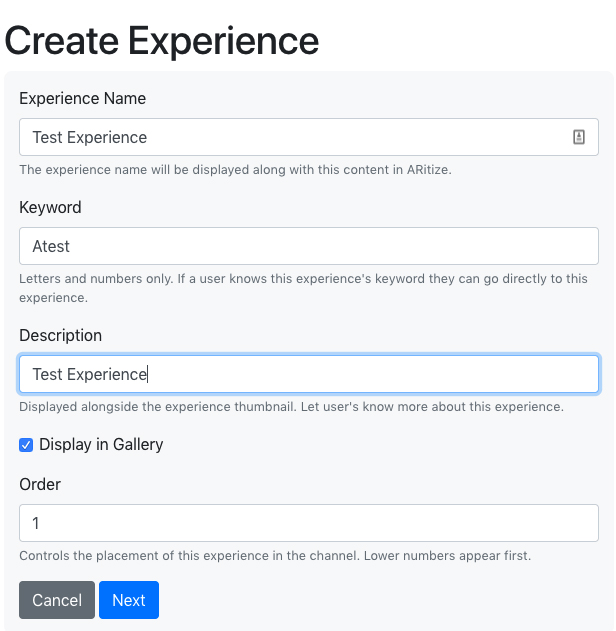
- Experience Name
- The display name of your experience.
- Keyword
- Used like a URL to your experience – users can enter this code to go directly to your experience by combining this keyword with the channel keyword using the
CHANNELKEYWORD.EXPERIENCEKEYWORDformat. - Description
- Short description of your experience for internal use
- Display in Gallery
- Toggles whether this experience shows up in your channel when viewing in the app – these can still be accessed with codes (determined by your keywords)
- Order
- Use this to determine the order your experiences show up in your channel in the app
Next you will upload the assets for your new experience:
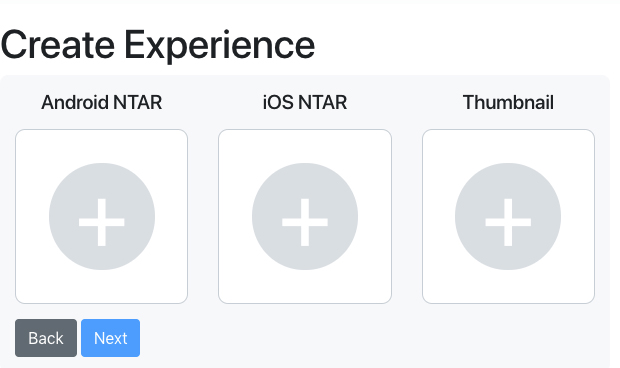
Experiences will only show up for a particular platform if you’ve uploaded a corresponding NTAR. Once you’ve uploaded and saved your experience, you can try it out in the app!
QR Codes
You can create QR codes users can scan to go directly to your channel or experiences. We will provide a tool to create these QR codes in the future, but in the meantime you can use pretty much any generator – we like this one. The format for QR codes is https://api.nextechar.com/qr/read/CHANNEL/EXPERIENCE – you can also create a QR code that opens your channel like this: https://api.nextechar.com/qr/read/CHANNEL
AR eCommerce Export
Under the export buttons for mobile platforms you’ll find the Build AR eCommerce button. This requires the AnchorForAR prefab to be in the scene. Currently, no modules are yet supported for the eCommerce platform – the Data object is ignored.
The AR EComm Viewer has support for a limited set of shaders, so you should stick with the Unity Standard Shader or the specific shaders listed below:
- EComm_PBR
- EComm_PBR_NoMap
- EComm_PBR_Transparent
- EComm_PBR_NoMap_Transparent